Basic HTML Version


8
CHOCOLATEFEST
January 10, 2013
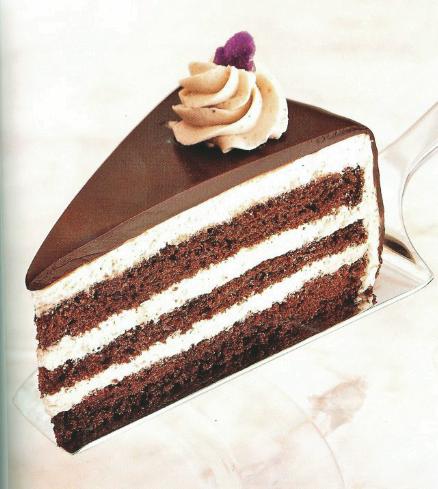
Gluten-free Chocolate
Macadamia Nut Cake
(provided by Brevin’s Solid
Gold Fudge)
Cake
1 gluten-free chocolate cake mix
3 eggs
Butter cream
4 sticks (32 tablespoons) unsalted
butter
2 tablespoons kirsch
3-4 cups crushed macadamia nuts
Kirsch syrup
1/3 cup sugar
1/3 cup water
1/4 cup kirsch
2 teaspoons vanilla extract
Chocolate glaze
1 1/2 cups heavy whipping cream
12 oz. Ghirardelli milk chocolate
chips
B
ake the cake according to
the directions using 3 eggs
instead of 2 to make the
cake lighter. Use two
9-inch pans.
2. Combine water and sugar in
small saucepan and bring to boil
over low heat. Cool and stir in kirsch
and vanilla extract. Set aside.
3. Place macadamia nuts in a
heavy plastic bag and place on hard
surface. Using a hammer, crush the
nuts until they form a powder with
some slightly larger pieces. The
largest piece should be no larger
than about 1/16 to 1/8 inch.
4. Place 4 softened (but not too
soft) sticks unsalted butter in mixing
bowl. Add about 3½ cups of the
crushed nuts. Beat on high speed
with electric mixer until butter
cream is light, soft and fluffy. Add
the kirsch a little at a time while
mixing to prevent the butter cream
from separating. Set aside in a cool
place. (Note, you can put the butter
cream in the refrigerator while the
cake is baking, but it will need to
come to room temperature before
you put it on the cake).
5. Bring the whipping cream to a
simmer in a saucepan over low heat.
Remove from heat and add choco-
late all at once. Make sure to move
the chocolate around until it’s all
covered with the cream. Let stand
for 5 minutes, then whisk to mix un-
til smooth. Set aside.
6. Remove the cakes from the
pans and place on rack. While still
hot, use a very sharp serrated knife
(or an electric knife, which works
much better) and carefully cut the
layers until they are uniformly thick.
This usually means the rounded top
of the layer so that the layer is the
same thickness throughout. Set
aside until cool.
7. The bottom of one layer will be
the bottom of the cake, and the bot-
tom of the other layer will be the top.
The cut sides where you removed
the rounded top of the layer will face
each other in the finished cake.
8. Using a pastry brush, brush
about half of the syrup on each layer
on the area that was cut off. The
cake will be fairly well soaked with
the syrup.
9. Place the bottom layer on one
of the pans used to bake the layer by
inverting the pan. This will elevate
the layer and make it easier to work
with. Spread about 1/3 of the butter
cream across the top of the layer
with a long, flat spatula. Now, invert
the top layer so the smooth bottom
side is on top and place it on the but-
ter cream. Cover the top of this lay-
er with another 1/3 of the butter
cream. Using the remaining cream,
cover the sides of the cake and
smooth out the top. The butter
cream should be about 1/4” to 3/8”
thick, and uniform over the entire
cake. Place the cake in the refrigera-
tor to cool for 1 hour.
10. Using a long knife or spatula,
carefully remove the cake from the
inverted cake pan and place on a
cooling rack. Place a sheet of alumi-
num foil under the rack and cake
11. Using a spatula that has been
heated in hot water, carefully go
over the butter cream and smooth
out any imperfections of area that
are sticking out or are rough. Doing
this will make the chocolate appear
much smoother on the finished
cake.
12. Carefully pour the glaze on the
top of the cake, starting in the center
and making ever-increasing circles
until the top is covered. It should
start to run down the sides of the
cake. Help it to do so with a warm
knife or small spatula that has been
warmed in water and wiped off.
When completed, the top should be
uniform and the sides uniform as
well with none of the butter cream
visible.
13. Decorate the top with pieces of
chocolate, one for each piece that
will be cut. These can be plain or as
fancy as you like.
14. Using a sharp, thin knife wet
with warmwater, cut the cake into
wedges. Wipe the knife between
each cut.
15. Refrigerate the finished cake.
Cover loosely.
Gluten-free
Chocolate Macadamia Nut Cake